
Yay! Wedding Week is here! That means that in one week I'll be celebrating one year of marriage with my wonderful husband!
Before we get started into all things wedding, I want to remind everyone to stop by my co-host, Kelley at The Grant Life, and check out her Wedding Week posts! And on Sunday, Kelley and I will both be hosting a Wedding Week Link Party so you all can link up your wedding posts!
Now, to kick things off let me start by telling you my philosophy on how to create the perfect wedding:
Now "the perfect wedding" is going to mean something totally different to each person. You might want a traditional church wedding with a formal dinner reception, a tropical destination wedding followed by dancing the night away, or a swanky, over-the-top, soiree complete with caviar and an 8 tier wedding cake... the point is the only way to make the perfect wedding, is making your wedding perfectly YOU!
Personalize, personalize, personalize! (And I don't mean order 1,000 monogrammed napkins.) Do your research. Scour the web and Pinterest (how did we plan weddings before Pinterest, by the way?). Visualize what your dream wedding looks like, and make every detail totally you.
We did not spend a ton of money on our wedding. At the time we were running a business and raising two children (I'll share our long, complicated, and triumphant love story another day), so it was not practical for us to throw thousands upon thousands of dollars toward a wedding. But by being creative, doing a lot of things ourselves, and remembering what's important, we were able to have our perfect wedding.

I already knew I wanted a pocket fold invitation. I love how they keep all the wedding details neatly nestled inside the invitation, instead of guests opening up the envelope and having a bunch of papers fall on the floor to be lost. I just didn't like the price that came with ordering custom pocket fold invitations. So I found a template and some inspiration and got to work! My inspiration came in the form of this beautiful, elegant blue scrapbook paper.

It ended up setting the entire color scheme and mood of the wedding and reception. I purchased probably 100 sheets of the paper so that I would have plenty to do my invitations and to also add to my save the dates, programs, and anything else I wanted to customize. Using the same design throughout your wedding will tie everything together and make it feel very custom!


You first need to make the pocket fold. Here's a template I made:

Take a 12" x 12" sheet of color card stock and cut a 3" x 6" rectangle from the bottom right corner. Fold the paper in half, running a bone folder (or a blunt object) down the crease to make it smooth. Open the paper back up, then take the flap on the bottom left side and fold it up, creating a pocket. Run a strip of glue along the left side to secure in place.
Here's a template I made to show the rest of the invitation assembly:

Take a 12" x 12" sheet of color card stock in a different color than your first and cut in half. (One sheet will make 2 invites) Trim it down to 9" x 6" and glue to the right side of your invitation.
Now you need to print the actual invitation and your inserts. Take 12" x 12" sheets of white card stock (you'll need 1 1/3 sheets for each invite) and cut into thirds. You should have 4" x 12" pieces. Trim those pieces into the following sizes:
- 4" x 9"
- 4" x 8"
- 4" x 7"
- 4" x 6"
Take the 4" x 9" piece and print the invitation from your computer. It's easy to do using Microsoft Word. Just format your page size to 4" x 9" and look for sample invitation wording on the internet to give you an idea of what you want your invite to say. Glue that piece, centered, on top of the blue card stock on the right side of the pocket fold.
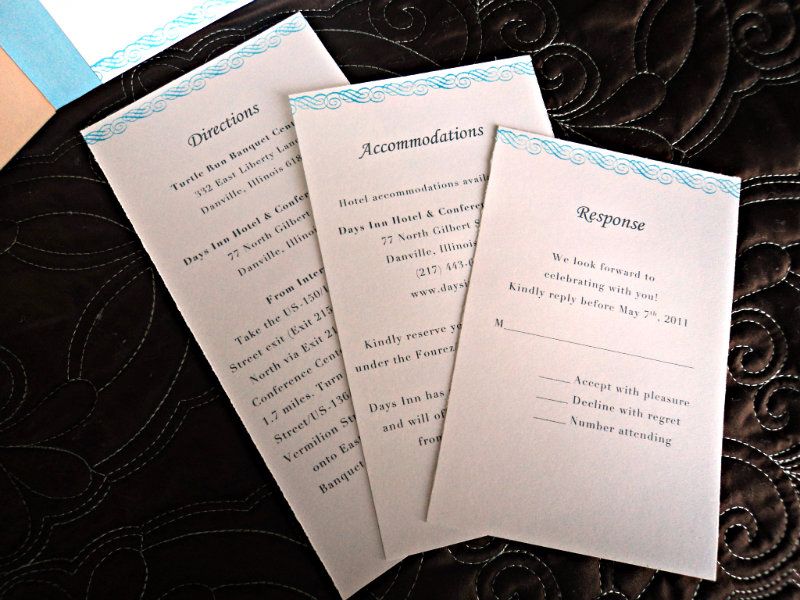
The remaining sizes of paper will be your inserts and can be printed with whatever information you would like your guests to have: response card, hotel accommodations, directions, reception information, gift requests, etc. Again, just format your page size in Microsoft Word and print from computer. I used the 4" x 6" piece as my response card. I turned it into a postcard by printing my address on the back side and used a postcard stamp. That saved me money on postage and the expense of another envelope.

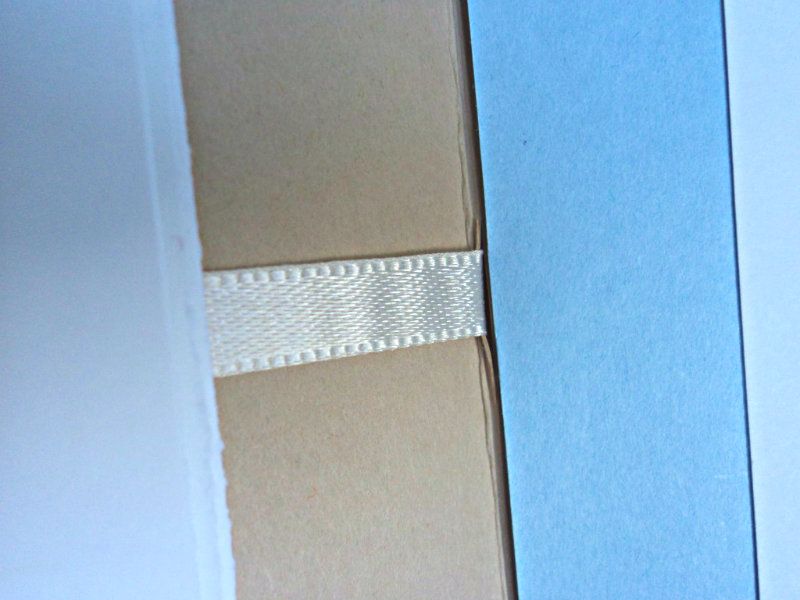
Stack your inserts inside the pocket you created on the left side of the invitation. All that's left is to decorate your invitation! I added a decorative stamp to the top of my inserts to add some color to the white card stock. I finished the front of the invitation by glueing a 2" x 6" strip of my blue floral paper across the middle and wrapped around a small satin ribbon with a hearts charm. I cut a tiny slit in the crease of my pocket fold to slide the ribbon through.

Ta-Daa! You just created a custom, beautiful, pocket-fold invitation for probably 1/4 of the price!


Ta-Daa! You just created a custom, beautiful, pocket-fold invitation for probably 1/4 of the price!
I ordered size A10 envelopes (one inner & one outer) and printed the addresses from my computer directly onto the envelope. That way I wasn't spending more money on labels, and I think it gave it a more polished look.

Here's a look at our Save The Dates:

I made monogrammed stickers out of circle labels from Staples so people could "mark their calendars."


So here's a recap of Day 1:
- Make your wedding perfectly YOU!
- Find your wedding inspiration
- Coordinate the design throughout your entire wedding
- Make your own invitations to save money and express your style
Don't miss the rest of Love Grows Wild Wedding Week!

A special thanks to my sponsors for Wedding Week!
0 comments:
Post a Comment