 As promised, today I'm going to show you how I made the viking hats, shields, and swords for my son's "How to Train Your Dragon" Birthday Party.
It all started with a cardboard box and a few rolls of duct tape.

I have a mountain of boxes in my basement from moving this summer, so I thought I might as well put one to use! I found a large roll of silver duct tape in the garage and picked up a roll of white and chrome from the store. So my total cost for this project was about $8.
Here's how I made the Viking Hats:
I started by cutting each side of the box apart with a box cutter. To get the measurements of my hat, I measured around my son's head and added 1 inch to the measurement. Then I measured from his forehead across the top to the back of his head where I wanted the hat to sit, and added 1 inch. To make 12 viking hats, I used a box cutter to cut 12 strips of each measurement about 2 inches wide out of the cardboard. The hats fit pretty much all the children at the party, using 22 inches for the bottom piece and 10 inches for the top piece.
To make the horns of the hat, I drew a horn shape on paper and used that as a template to trace the shape onto the cardboard. You can make small horns like mine or go crazy with large ones, just make sure the straight part of your horn is 2 inches wide.

I split the base of my horns about 1/2 inch so I could easily attach them to the hat later.

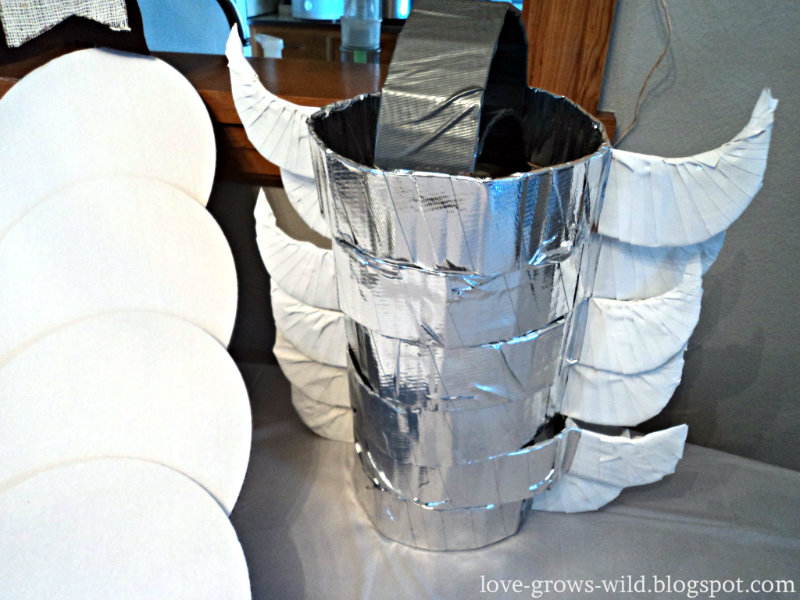
Next, I wrapped the top and bottom pieces with silver duct tape,

And the horns with white duct tape.

I found it easiest to wrap the horns with small strips of tape, so I cut mine into thirds. You can save yourself by this step by using small masking tape. I just wanted mine to be bright white, not ivory!
(P.S. Does anyone else's floor look like this when they're in the middle of crafting?)

I wrapped and wrapped and wrapped until I had 12 bottom pieces, 12 top pieces, and 24 horns. There may have been Oreos involved during this process.

Next I hot glued the bottom piece into a circle and glued the top piece onto the bottom, forming the top of the hat.

Then I hot glued the inside of the split cardboard on my horns and attached them to the sides of the hats.

After all the pieces were glued on, I wrapped tape around the parts I glued to ensure my little vikings couldn't tear them apart. And I must say, for DIYing these myself out of a box and tape, they're REALLY sturdy!
And here's how I made the swords:
These were much simpler than the hats. I cut 12 strips of cardboard 1 foot long and 2 1/2 inches wide and again, used paper to create a template for the point of the sword. Then I cut 12 small strips measuring 4 1/2 inches long by 1 1/4 inches wide.

I wrapped the swords in silver duct tape and wrapped the bottom 2 inches in white tape to create a handle. Then I wrapped the small strips in white tape and hot glued them onto the sword.

And now my little vikings had swords to train their dragons! All that was left were the shields.

By the time I got to them, I had about enough of cutting and taping cardboard, so I took the easy way out and purchased twelve 8" cake boards from Hobby Lobby. I cut twelve more small strips of cardboard and glued and taped them to the back of the cake boards to create handles. I left the fronts of them blank so the kids could color and decorate them at the party.


It may have taken me about a day and a half to get everything put together, but watching all the kids have a blast with their viking gear made it all worth it! They got to take everything home and hopefully will continue to enjoy them there!

And the best part... it only cost me $8!!
Subscribe to Blog | Follow on Facebook | Follow on Pinterest | Party with Me

0 comments:
Post a Comment