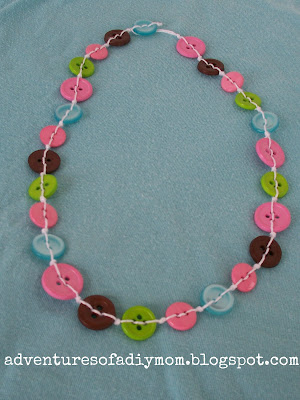
Today I'm swapping blogs with Rachel from Adventures of a DIY Mom. She's going to show you a super cute necklace tutorial here, and I'm sharing a recipe for Inside-Out S'mores Brownies over at her blog!
Mmm... I'm drooling just thinking about them! You don't want to miss this recipe!
So without further adieu, here's Rachel!
So without further adieu, here's Rachel!
I'm Rachel and I blog over at Adventures of a DIY Mom.
I love to share craft and sewing projects. I love to bake and I often share recipes. I also host a weekly link party on Tuesdays.
Some of my favorite projects lately are:
Some of my favorite projects lately are:
Today I'm going to show you how to make two types of button necklaces. I got the idea here.
This type of necklace is super easy.
Start by cutting piece of string {I used crochet thread} double the length you want your necklace to be. Then fold the string in half and tie a knot in the end making a loop like shown in the picture on the left. You want the loop to be big enough to fit over a button, because this is how you will clasp the necklace.
I found that if I put a little tacky glue on the ends of the string and let it dry it will help the string not to unravel as you try to string the buttons.
Start stringing your buttons on both pieces of the thread. Go down one hole and up the other {see the middle picture}
Then pull your button all the way down to the knot or to the previous button.
Keep on stringing buttons until it's done. It gives a nice layered look.
The next way is a little more complex but just as cute.
1. Start with a long length of sting {about 1 1/2 yards}, fold in half and tie a knot in the end to make a loop.
2. This pictures just shows you how long my string is.
3. Next put one string up one button hole.
4. And down the other side.
5. Now, with the other string, go down the hole you first went up.
6. And go up the hole that you first went down.
{Does that make sense? It's kind of hard to write it down. If you're confused, go check out this video, it helps to have a visual sometimes.}
7. Pull the button all the way to the knot.
8. Tie a knot after the button.
Repeat until your necklace is the length you like and cut off excess string.
Use the loop to wrap around the end button to make a necklace.
I also made a bracelet. I'm loving these colors. The blue goes perfectly with one of my t-shirts. {Which I just happened to use as my background}
Liz, thank you so much for having me!
I think they are adorable! I love the bracelet, and the necklace would be perfect for a little girl. Thanks so much for sharing, Rachel!
I've had a blast blog swapping today. I hope you'll stop by Adventures of a DIY Mom and check out my S'mores Brownies recipe. Trust me, this one is a keeper!


0 comments:
Post a Comment